Account & Character Setup
Before you can run a multiplayer PIE session, every player slot needs a logged-in account with a created character. MIP ships a built-in Editor Utility Widget — EUW_Account_Settings — that lets you register, log in, and create characters directly inside the Unreal Editor without a separate client build.
Required before PIE
Skipping this step will cause the editor to crash when you launch a multiplayer PIE session. Each player slot must have its own logged-in tab with a saved character.
Step 1 — Open the Widget
-
In the Content Browser, navigate to:
Or use the search bar at the top of the Content Browser and type:
-
Right-click
EUW_Account_Settingsand select Run Editor Utility Widget.
The widget opens as an editor tab. It starts on the Register screen.
Step 2 — Register an Account
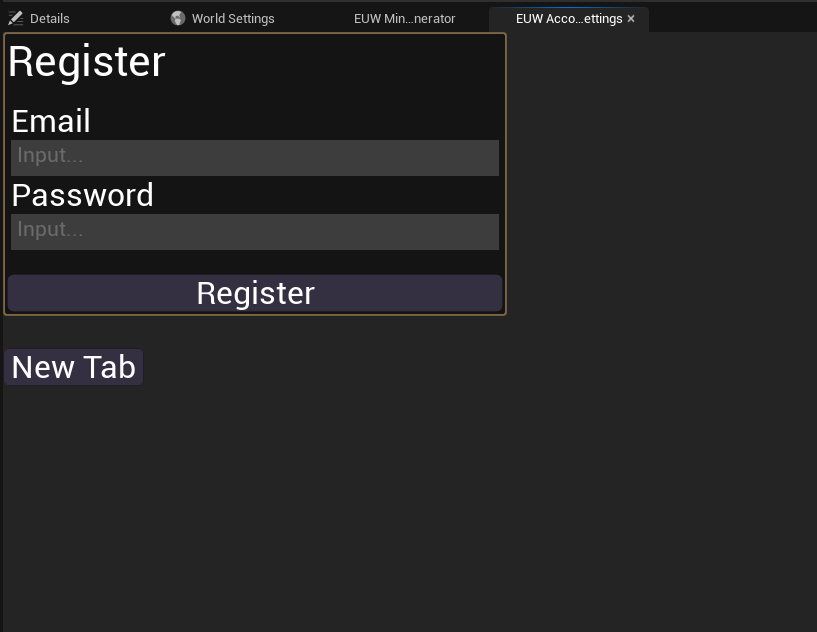
- Enter an Email and Password for your first account.
- Click Register.
-
Open the Output Log (
Window → Output Log) and look for:This confirms the account was created on the backend. If you see an error, check that your backend is running — see Running the Backend.
Step 3 — Log In and Create a Character
After registration the widget shows a New Tab button.
-
Click New Tab — this creates the first player slot (Tab 1).
-
On the new tab, log in with the email and password you just registered.
-
Once logged in, click Create Character.
-
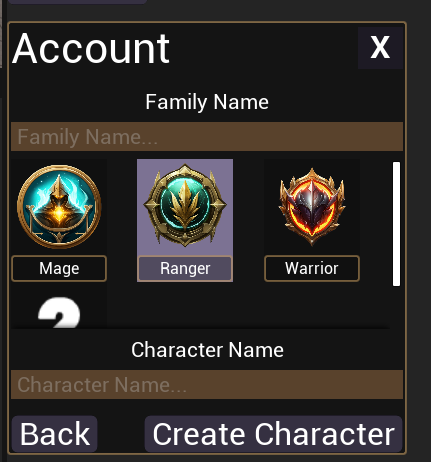
Fill in the character creation form:
Field What to enter Family Name Your account-wide family name (set once per account) Class Select a class icon — Mage, Ranger, Warrior, etc. Character Name The name for this character -
Click Create Character.
-
Check the Output Log for
{"message":"success"}to confirm the character was saved. -
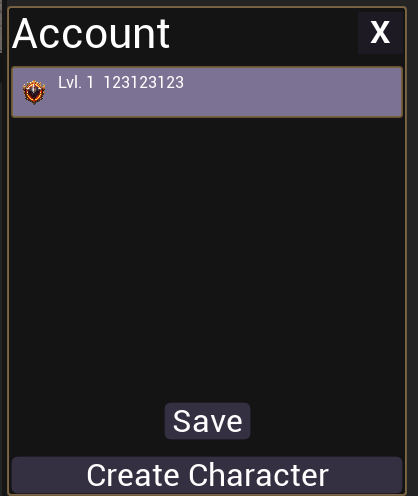
You will see the newly created character appear in the character list on Tab 1.
-
Click Save to lock in that character as the active selection for Tab 1.
Step 4 — Add More Tabs for Additional Players
Each Tab in EUW_Account_Settings maps to one PIE player instance — Tab 1 is player 1, Tab 2 is player 2, and so on.
To add a second player slot:
- Click New Tab again.
- Log in with a different account (register another if needed — repeat Step 2).
- Create a character for that account.
- Click Save.
Repeat for as many simultaneous players as you want to test.
Each tab = one PIE instance
The number of saved, logged-in tabs must be equal to or greater than the number of players in your PIE session. If you launch 3 players but only have 2 saved tabs, the third instance will crash.
Step 5 — Enable Allow Late Joining (Optional)
If you want to add a client mid-session (after PIE has already started) without restarting:
- Go to Edit → Editor Preferences.
- In the search bar type
Allow Late Joining. - Enable the Allow Late Joining checkbox.
With this enabled you can:
- Click Add Client in the PIE toolbar while the session is running to spawn an additional player.
- Or increase Number of Players in Play settings — but keep it at or below the number of saved tabs.
Don't exceed your saved tab count
Launching more player instances than saved tabs will crash the additional instances. Always have enough tabs ready before increasing the player count.
Summary
| Step | Action |
|---|---|
| 1 | Open EUW_Account_Settings → Run Editor Utility Widget |
| 2 | Register an account → confirm {"message":"success"} in Output Log |
| 3 | Click New Tab → log in → Create Character → Save |
| 4 | Repeat Step 3 for each additional PIE player |
| 5 | (Optional) Enable Allow Late Joining in Editor Preferences |
Next Steps
| What | Link |
|---|---|
| Run the backend that handles accounts | Running the Backend |
| Set up Minikube & Agones for multiplayer networking | Installing Minikube & Agones |